
Paint Your Own Cookie Kits offer a delightful, creative activity, blending baking and artistry! These kits simplify festive fun, providing everything needed for edible masterpieces․
They’re gaining immense popularity, especially during holidays, offering a unique, engaging experience for all ages, fostering creativity and joyful moments․
Today is 04/07/2026 16:18:01 ()
What are Paint Your Own Cookie Kits?
Paint Your Own Cookie Kits are all-inclusive packages designed for a fun, creative experience․ Typically, these kits contain pre-baked cookies, ready for artistic expression․
Essential components include royal icing pouches – the “paint” – and small paintbrushes for precise application․ Edible food coloring allows for vibrant hues, while sprinkles and decorations add delightful finishing touches․
These kits eliminate the need for baking, focusing solely on the enjoyable decorating process, making them ideal for families and individuals alike․
They provide instructions for decorating cookies with icing․
The Rising Popularity of DIY Cookie Decorating
DIY cookie decorating has experienced a surge in popularity, fueled by a desire for creative outlets and family bonding activities․ These kits offer a convenient alternative to traditional baking, especially during busy holiday seasons․
Parents appreciate the ease and minimal mess, while individuals enjoy the therapeutic benefits of artistic expression․
The trend is further amplified by social media, showcasing stunning cookie designs and inspiring others to participate․
Kits prepared by someone are heaven-sent for parents․
Kit Contents: What to Expect
Paint Your Own Cookie Kits typically include pre-baked cookies, royal icing pouches, edible food coloring, paintbrushes, and sprinkles for delightful decoration!
Pre-Baked Cookies
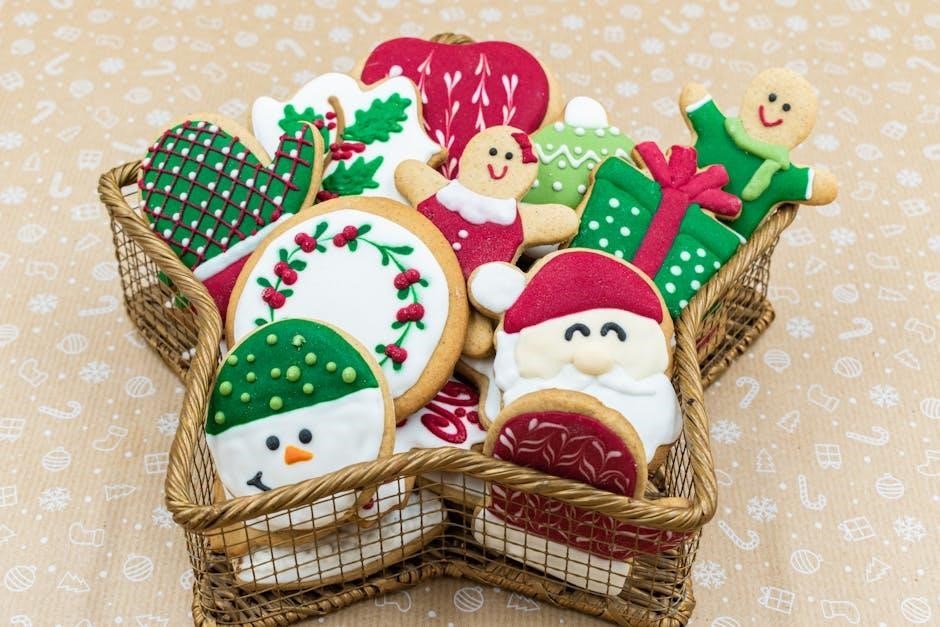
Paint Your Own Cookie Kits invariably feature pre-baked cookies, eliminating the need for oven time and simplifying the creative process․ These cookies are often sugar cookies, chosen for their flat surface ideal for decorating․
They’re individually wrapped to maintain freshness and hygiene, ready for your artistic touch․ Expect various shapes – stars, gingerbread people, or holiday-themed designs – providing a fun canvas for edible art․

Royal Icing Pouches
Paint Your Own Cookie Kits include royal icing pouches, the essential “paint” for your edible canvas․ This icing, made from powdered sugar and meringue powder, provides a smooth, paintable consistency․
Pouches are pre-filled for convenience, often in white, ready to be tinted with the included food coloring․ Some kits offer multiple pouches for different colors, streamlining the decorating process․ They are sealed to prevent drying and maintain optimal texture․
Paintbrushes
Paint Your Own Cookie Kits thoughtfully include small, food-safe paintbrushes, designed for precise icing application․ These brushes aren’t your typical art tools; they’re specifically chosen for their ability to handle the delicate texture of royal icing․
Typically, kits provide several brushes in varying sizes, allowing for both broad strokes and intricate detailing․ They enable a “painting” experience, transforming cookie decorating into a truly artistic endeavor, perfect for all skill levels․
Edible Food Coloring
Paint Your Own Cookie Kits feature vibrant, edible food coloring, the key to bringing your cookie creations to life! These colorings are specifically formulated for use with royal icing, ensuring brilliant hues and smooth blending․
Kits often include a range of primary colors, allowing for custom shade mixing and endless possibilities․ The food coloring is safe for consumption, providing peace of mind while unleashing artistic expression on your sweet canvases․
Sprinkles and Decorations
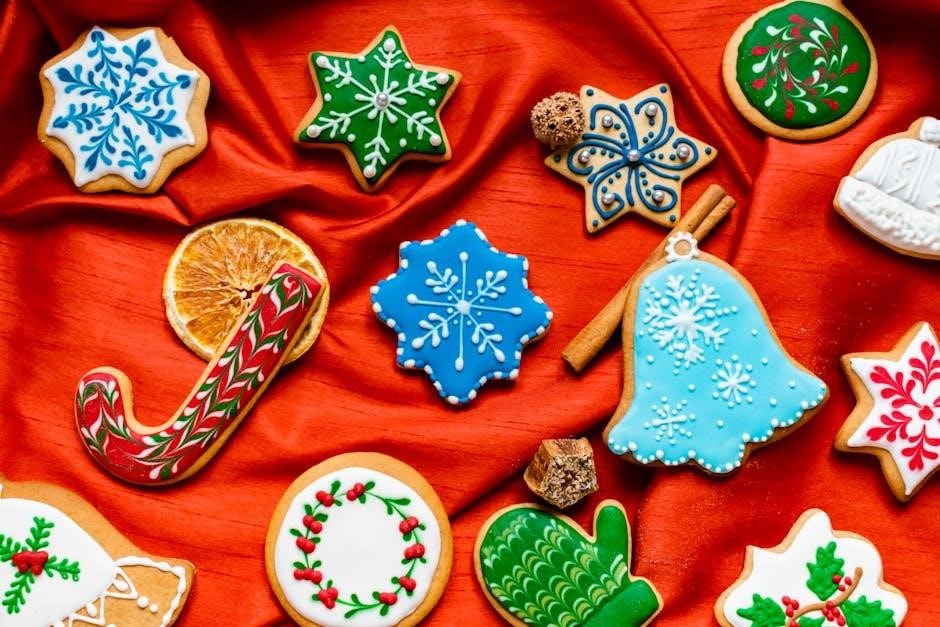
Paint Your Own Cookie Kits wouldn’t be complete without a dazzling array of sprinkles and edible decorations! These delightful additions transform simple cookies into festive works of art, adding texture and visual appeal․
Expect to find colorful nonpareils, shimmering sugars, and perhaps even themed sprinkles for holidays or special occasions․ These embellishments encourage creativity and allow for personalized touches, making each cookie uniquely special and utterly irresistible․
Preparing for Cookie Decorating
Successful cookie decorating begins with preparation! Clear a spacious workspace, protect surfaces, and gather all kit components for a smooth, enjoyable creative process․
Setting Up Your Workspace
Creating a dedicated workspace is crucial for a stress-free decorating experience․ Choose a well-lit, flat surface – a kitchen table or countertop works perfectly․ Cover it with a disposable tablecloth, parchment paper, or a silicone mat to protect against icing mishaps․
Ensure you have enough room to comfortably spread out all kit components: cookies, icing pouches, paintbrushes, sprinkles, and any optional supplies․ Having everything within easy reach minimizes interruptions and keeps the creative flow going․ A little organization goes a long way!
Protecting Your Surfaces
Royal icing, while delicious, can be messy! Protecting your work area is paramount; Disposable tablecloths are an excellent first line of defense, easily catching drips and spills․ Alternatively, cover surfaces with parchment paper or silicone baking mats – these are reusable and provide a non-stick surface․
Consider laying down old newspapers or plastic sheeting for extra protection, especially if working with enthusiastic young decorators․ A little preparation prevents a lot of cleanup, ensuring a fun and frustration-free experience!
Gathering Additional Supplies (Optional)
While kits provide essentials, enhancing your experience is easy! Consider small bowls for separating icing colors, allowing for custom blends․ Toothpicks are fantastic for detailed work and correcting minor mistakes․ Gel food coloring boosts vibrancy beyond the kit’s offerings․

Piping bags and tips elevate designs, though not essential․ A damp cloth keeps fingers clean, and a rotating cake stand aids accessibility․ These additions unlock greater creative control and personalization!
Step-by-Step Decorating Instructions
Begin by applying a base icing layer, then allow it to fully dry before “painting” with edible colors․ Add details and designs for a festive finish!
Applying the Base Icing
Start with your pre-baked cookies and royal icing pouches․ Gently squeeze the icing onto each cookie, covering the surface evenly․ A smooth, consistent layer is key for a beautiful canvas․ Utilize a small offset spatula or the back of a spoon to spread the icing, ensuring it reaches the edges․
Don’t worry about perfection at this stage; the goal is full coverage․ Remember, this base provides the foundation for your artistic expression, so take your time and enjoy the process!
Letting the Base Icing Dry
Allowing the base icing to dry completely is crucial before adding details․ This prevents colors from bleeding and ensures clean lines․ Typically, this takes around 6-8 hours at room temperature, or you can speed it up with a low-fan setting on a dehydrator․
The icing should be firm to the touch, without any tackiness․ Patience is key; a properly dried base guarantees a polished, professional-looking final product․ Resist the urge to rush this step!
“Painting” with Edible Food Coloring
Now for the fun part: painting! Dip your paintbrush into the edible food coloring and gently apply it to the dried base icing․ Think of it like watercolor painting – start with light layers and build up the color intensity gradually․
Experiment with different brushstrokes and techniques to create unique effects․ Remember, edible food coloring is concentrated, so a little goes a long way!
Adding Details and Designs
Once your base is dry and colored, it’s time for details! Use a fine-tipped brush for intricate designs like flowers, patterns, or lettering․ Sprinkles and other decorations can be added while the icing is still slightly wet, ensuring they adhere properly․
Let your imagination run wild – create personalized messages, festive scenes, or abstract art․ This is where your cookie truly becomes a masterpiece!
Icing Consistency and Techniques
Achieving the right icing consistency is key! Flood icing should be smooth and spreadable, while outline icing needs to be thicker for precise detailing and structure․
Achieving the Right Icing Consistency
Royal icing consistency is crucial for successful cookie decorating․ Too thick, and it’s difficult to spread; too thin, and it runs off the cookie! Start with a medium consistency, then adjust with drops of water (to thin) or powdered sugar (to thicken)․
For flood icing, aim for a honey-like texture – it should settle back into itself slowly․ Outline icing needs to hold its shape, so it should be stiffer, like toothpaste․ Practice makes perfect, so experiment to find what works best!
Flood Icing vs․ Outline Icing
Flood icing creates a smooth, even base for your designs․ Its thinner consistency allows it to “flood” the cookie surface, filling in all the spaces․ It’s ideal for large areas and vibrant backgrounds, providing a canvas for detailed work․
Outline icing, being thicker, defines shapes and adds borders․ It prevents colors from bleeding and provides structure․ Use it to create intricate details and crisp lines, enhancing the overall aesthetic of your decorated cookies․
Using Piping Bags (Optional)
Piping bags offer greater control and precision when decorating cookies, though not essential for paint-your-own kits․ They allow for intricate designs and detailed work, especially with outline icing․ Simply fill the bag with icing, attach a tip (optional), and gently squeeze to create desired shapes․
For beginners, snip the bag’s tip or use without a tip for simpler designs․ Practicing pressure control is key to achieving clean lines and consistent results, elevating your cookie artistry!
Troubleshooting Common Issues
Decorating can present challenges! Icing too thick? Add drops of water․ Too thin? Mix in powdered sugar․ Dull colors? More food coloring is needed!
Icing is Too Thick
Dealing with thick royal icing is common! If your icing resembles paste rather than a smooth, spreadable consistency, don’t worry – it’s easily fixable․ The key is to gradually add liquid, a few drops at a time․
Water is the most common solution, but a tiny bit of light corn syrup can also help maintain shine․ Mix thoroughly after each addition, ensuring it’s fully incorporated before adding more․
Remember, patience is crucial; you want to achieve a pipeable, yet flowing, texture․ Avoid adding too much liquid at once, as this can quickly make the icing too thin!
Icing is Too Thin
Thin icing can be frustrating, leading to messy designs and bleeding colors․ To thicken your royal icing, the solution is powdered sugar! Add it gradually, one tablespoon at a time, mixing thoroughly after each addition․
Ensure the powdered sugar is fully incorporated before assessing the consistency․ Avoid large additions, as this can create a grainy texture․
The goal is to reach a consistency where the icing holds its shape slightly but still flows smoothly from your brush or piping bag․ Patience is key to achieving the perfect texture!
Colors are Not Vibrant Enough
Faded colors can diminish the impact of your cookie art․ To achieve vibrant hues, use gel food coloring instead of liquid․ Gel coloring is more concentrated, requiring less to achieve a bold shade․
Add coloring gradually, mixing well after each drop․ Remember, you can always add more, but it’s difficult to lighten a color once it’s too dark․
For deeper shades, allow the colored icing to sit for a few minutes; the color will often intensify over time․
Cookie Storage and Preservation
Proper storage keeps decorated cookies fresh! Store in airtight containers at room temperature for up to a week, maintaining their delightful appearance and taste․
Storing Decorated Cookies
Maintaining freshness is key! Once your beautifully decorated cookies are complete and the icing has fully set, proper storage is crucial․ Airtight containers are your best friend; they prevent the cookies from drying out and absorbing unwanted odors․
Individually wrapping each cookie in plastic wrap before placing them in the container offers an extra layer of protection․ Avoid stacking cookies directly on top of each other, as this can smudge the delicate designs․ Consider layering them between sheets of parchment paper․
Storing at room temperature is generally best, but avoid direct sunlight or heat sources․
Shelf Life of Decorated Cookies
Enjoy your creations, but don’t delay! The shelf life of your decorated cookies depends heavily on the ingredients used and storage conditions․ Generally, cookies stored properly in airtight containers at room temperature will remain fresh for approximately one to two weeks․
However, cookies with royal icing can maintain a slightly longer freshness, potentially up to three weeks․ If you notice any changes in texture, smell, or appearance, it’s best to discard them․
For longer storage, freezing is an option, though it may slightly affect the icing’s texture․
Safety Considerations
Prioritize safety! Be mindful of allergies and choking hazards (sprinkles)․ Young children require close supervision during decorating to prevent accidental ingestion․
Allergies and Dietary Restrictions
Crucially, always check ingredient lists for common allergens like wheat, dairy, eggs, and nuts, as cookies and icing frequently contain these․ Kits may be produced in facilities handling allergens, increasing cross-contamination risk․
Clearly label kits with complete ingredient information, and provide allergy warnings․ Consider offering gluten-free or vegan cookie options to accommodate diverse dietary needs․ Communicate potential allergens prominently to ensure informed consumer choices and prevent adverse reactions․
Choking Hazards (Sprinkles)
Small sprinkles pose a significant choking risk, particularly for young children․ Supervision is absolutely essential during decorating, ensuring children don’t ingest sprinkles recklessly․ Consider including larger, age-appropriate decorations as alternatives․
Clearly label kits with a choking hazard warning, advising parental supervision․ Educate consumers about the potential dangers and safe usage practices․ Opt for larger sprinkle varieties when possible, minimizing the risk for vulnerable individuals․ Prioritize safety above all else․
Supervision for Young Children
Constant adult supervision is crucial when young children engage with paint your own cookie kits․ Small parts, like sprinkles, present choking hazards, and edible components should be consumed responsibly․ Guidance ensures a safe and enjoyable experience, fostering creativity without risk․
Assist with icing application and food coloring usage, preventing messes and accidental ingestion․ Explain safe decorating practices and emphasize that kit contents are for creative expression, not excessive eating․ Active involvement enhances the fun and guarantees safety․
Expanding Your Cookie Decorating Skills
Elevate your artistry! Explore advanced icing techniques, design custom cookie cutters, and experiment with diverse decoration styles for truly unique, personalized creations․
Advanced Icing Techniques
Beyond the basics, delve into wet-on-wet techniques, creating stunning marbled effects and intricate floral designs․ Master the art of brush embroidery, adding delicate textures and realistic details to your cookies․ Explore layering colors for depth and dimension, achieving a professional finish․
Experiment with stenciling for precise patterns and utilize edible luster dusts for a shimmering, elegant touch․ Learn to create 3D elements, elevating your cookies into miniature works of art․ These skills transform simple cookies into breathtaking edible masterpieces!
Creating Custom Cookie Cutters
Unleash ultimate creativity by designing personalized cookie cutters! Utilize polymer clay, easily molded into any shape imaginable – from beloved characters to intricate logos․ Alternatively, employ acrylic sheets, tracing designs and carefully cutting them out with a craft knife for precise shapes․
Consider 3D printing for complex designs, offering unparalleled customization․ Ensure food-safe materials are used for all cutters․ Custom cutters elevate your cookie decorating, transforming ordinary treats into uniquely memorable creations!
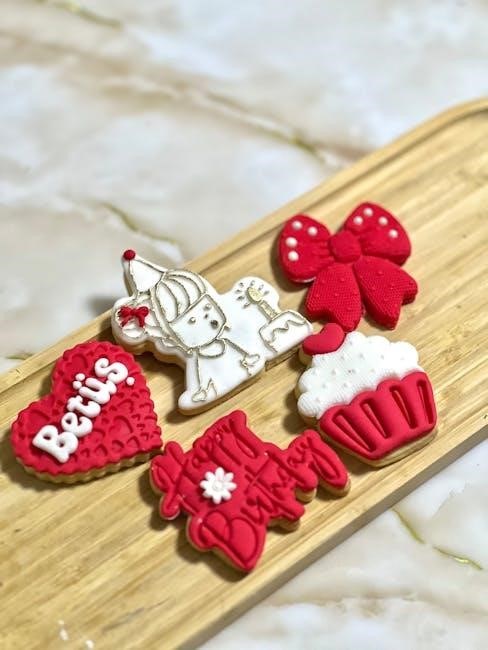
Exploring Different Decoration Styles
Beyond basic painting, discover diverse cookie decorating techniques! Experiment with ombre effects, blending food coloring for gradient shades․ Try marbling, swirling colors for a unique, artistic look․ Explore stenciling, using patterns for intricate designs, or venture into royal icing techniques like wet-on-wet for floral details․
Embrace seasonal themes, adapting styles to holidays․ Don’t be afraid to combine techniques, creating truly personalized and stunning cookie art!
Where to Buy Paint Your Own Cookie Kits
Kits are readily available online through major retailers and Etsy․ Local bakeries and craft stores also offer options, including DIY components for customization!
Online Retailers
Numerous online platforms provide a vast selection of Paint Your Own Cookie Kits, offering convenience and diverse choices․ Amazon, Etsy, and specialized baking supply websites are excellent starting points for your search․
These retailers frequently feature kits with varying themes, cookie shapes, and icing color palettes, catering to different preferences and occasions․
Many offer quick shipping and customer reviews, aiding informed decisions․ Supporting small businesses through Etsy is also a fantastic option, discovering unique, handcrafted kits!
Local Bakeries and Craft Stores
Exploring local options often reveals charming Paint Your Own Cookie Kits crafted by nearby bakers and artisans; Local bakeries frequently offer seasonally themed kits, providing fresh, delicious cookies and unique designs․
Craft stores may carry DIY kit components, allowing for complete customization․ Supporting local businesses fosters community connections and ensures a personalized touch․
These stores often provide expert advice and inspiration, enhancing your decorating experience․ Discovering hidden gems and supporting local talent is a sweet reward!
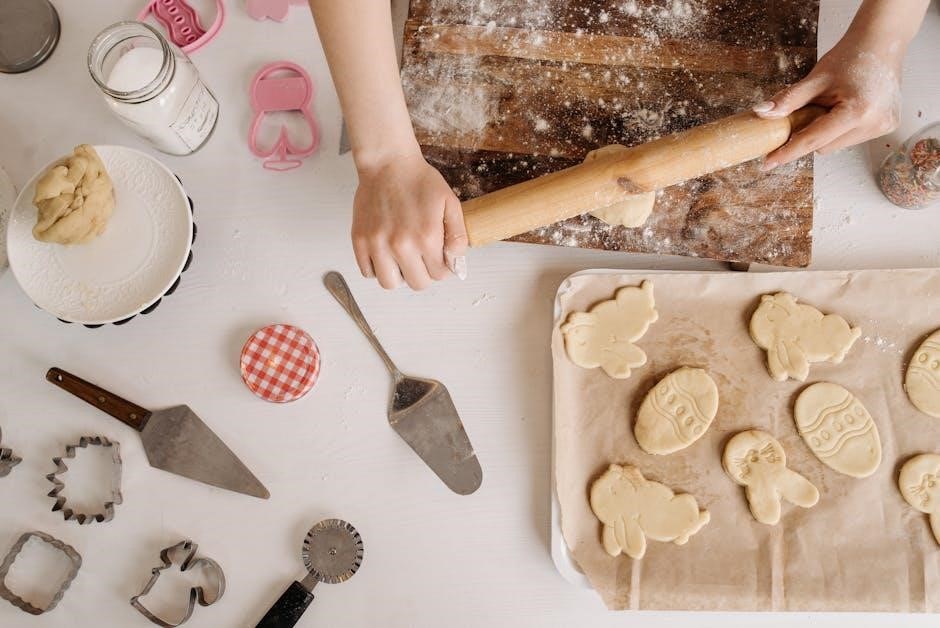
DIY Kit Options
Creating your own Paint Your Own Cookie Kit offers ultimate flexibility and cost-effectiveness! Source pre-baked cookies, royal icing mixes, edible food coloring, and sprinkles from grocery stores or online suppliers․
Assemble the kit in charming packaging, including instructions for a personalized touch․ This allows tailoring to dietary needs and preferences, ensuring inclusivity․
DIY kits are perfect for large groups or themed parties, fostering creativity and memorable experiences․ Embrace the fun of crafting a unique, delightful activity!
Legal Considerations for Selling Kits
Selling cookie kits requires navigating state regulations and food safety guidelines․ Permits may be necessary, and adherence to proper handling practices is crucial for compliance․
State Regulations and Permits
Navigating state laws regarding homemade food sales is essential when offering paint your own cookie kits․ Many states have specific cottage food laws dictating what you can sell, where, and how․
Some states outright prohibit selling decorated cookies, while others require permits, inspections, or food handler certifications․ Researching your local regulations is paramount to avoid legal issues․
Understanding labeling requirements, including allergen information, is also vital․ Failing to comply can result in fines or business closure, so due diligence is key․
Food Safety Guidelines
Maintaining impeccable hygiene is crucial when preparing paint your own cookie kits․ Always wash hands thoroughly before handling ingredients and use sanitized surfaces․ Properly storing cookies to prevent contamination is essential, utilizing airtight packaging․
Ensure all ingredients are fresh and sourced from reputable suppliers․ Clearly label kits with allergen information and “best by” dates․ Following these guidelines minimizes risks and ensures customer safety․
Adhering to food safety standards builds trust and protects your business from potential liabilities․
The Benefits of Cookie Decorating
Cookie decorating sparks creativity, strengthens family bonds, and provides a relaxing, stress-relieving outlet․ It’s a joyful activity for all ages, fostering connection and fun!
Creative Expression
Paint Your Own Cookie Kits unlock a world of artistic possibilities! These kits aren’t just about following instructions; they’re about unleashing your imagination onto a delicious canvas․
Whether you prefer intricate designs or whimsical patterns, cookies become a medium for self-expression․ The edible food coloring and sprinkles allow for vibrant, personalized creations․ It’s a fantastic way to explore artistic talents, experiment with color combinations, and develop unique decorating styles, fostering a sense of accomplishment and joy․
Family Bonding

Paint Your Own Cookie Kits provide a wonderful opportunity for quality family time! Gathering around a table to decorate cookies creates lasting memories and strengthens bonds․
These kits encourage collaboration, communication, and shared laughter as everyone contributes their creative flair․ It’s a delightful activity that transcends age gaps, allowing parents, children, and grandparents to connect and enjoy a shared experience․ These kits are heaven-sent for parents!
Stress Relief
Paint Your Own Cookie Kits offer a surprisingly therapeutic escape from daily stresses! The act of decorating, focusing on intricate designs, and working with colors can be incredibly calming and meditative․
It’s a chance to unplug, unleash your inner artist, and simply enjoy the present moment․ This creative outlet provides a welcome distraction from worries, promoting relaxation and a sense of accomplishment․ Cookie decorating is a festive activity that puts you in a holiday mood!

No Responses