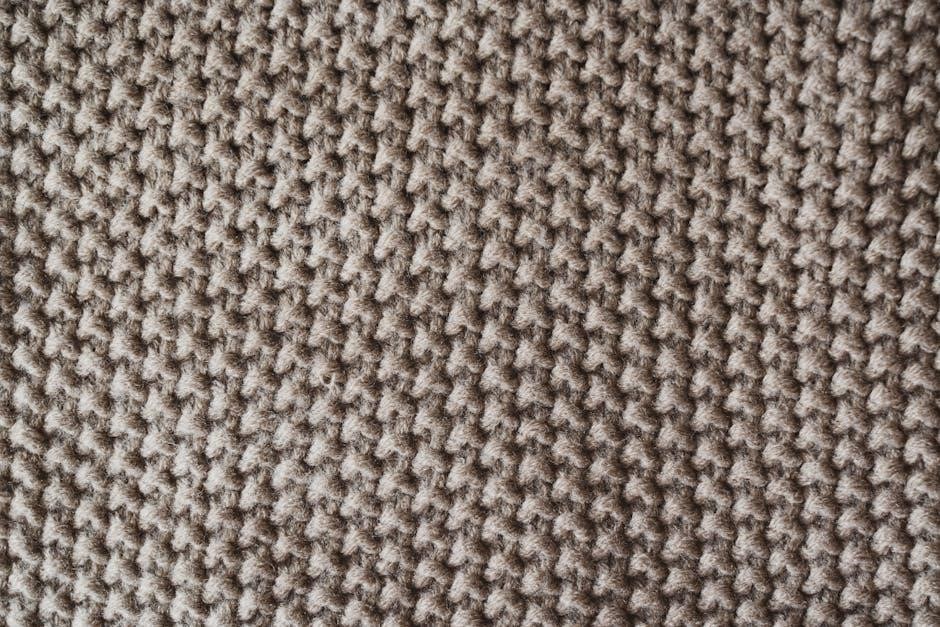
Brioche stitch is a knitting technique known for its lofty‚ ribbed texture‚ creating a squishy‚ reversible fabric. It’s like a buttery brioche bun‚ airy and luxurious. This tutorial demystifies the process‚ offering insights into one-color techniques. Get ready for your knitting skills to be improved!

Understanding Brioche Stitch Basics
Brioche stitch involves unique elements like slipped stitches and yarn overs‚ creating a distinct raised texture. It’s often considered more advanced than basic knitting but is achievable with some practice. It’s a combination of stitches that makes a nice‚ thick‚ double-sided fabric. Master the fundamentals and unlock brioche’s potential.
What is Brioche Stitch?
Brioche stitch is a knitting technique that produces a lofty‚ thick‚ and reversible ribbed fabric‚ prized for its warmth and squishiness. Its distinctive texture arises from a combination of slipped stitches and yarn overs‚ creating a fabric that appears almost three-dimensional. The end result is a fabric that is very similar to the light and airy brioche bun.
Brioche creates rows of alternating knit and purled stitches similar to a rib stitch‚ but it is bit more advanced. It is advisable to use a stretchy cast-on and bind-off.
The elements of all such patterns are (1) a slipped stitch‚ and (2) a yarn-over; these are knitted together on the return row. While this particular pattern is expressed as two rows‚ its technically a one-row repeat.
Often mistaken as complicated‚ the beauty of brioche lies in understanding its core components. With practice‚ even beginners can master this beautiful stitch. Brioche’s texture transforms simple projects into gorgeous creations‚ adding richness and depth.
Key Elements: Slipped Stitches and Yarn Overs
The brioche stitch relies heavily on two essential techniques: slipped stitches and yarn overs. These elements intertwine to create the stitch’s characteristic depth and texture. A slipped stitch involves moving a stitch from one needle to the other without working it‚ maintaining the height and structure of the fabric. It is typically slipped purlwise‚ contributing to the stitch’s unique appearance.
A yarn over (YO) is created by bringing the yarn over the needle‚ adding a new loop. In brioche‚ yarn overs often accompany slipped stitches‚ forming a pair that is later worked together. This combination creates a raised effect‚ contributing to the stitch’s loftiness.
The yarn forward‚ slip 1‚ yarn over (Yf-Sl1-YO) is a fundamental sequence in brioche. Bring the working yarn under the right needle to the front of the work. Slip the next stitch purlwise‚ then bring the working yarn over the needle.
Understanding these key elements is essential for mastering the brioche stitch‚ opening doors to intricate patterns and textures.

One-Color Brioche Stitch Tutorial
Learn how to make a one-color brioche stitch. Follow our step-by-step instructions for beginners and learn how to create this fluffy and fun stitch. We’ll guide you in creating a lofty‚ ribbed fabric. Dive in and explore the fun of one-color brioche!
Step-by-Step Instructions for Beginners
For beginners eager to dive into one-color brioche stitch‚ start by casting on an even number of stitches. This is the foundation for creating that lovely‚ lofty fabric. Next‚ the first row involves a simple slip stitch‚ yarn over sequence‚ setting the stage for the brioche magic to come.
The subsequent rows are where the texture begins to emerge. You’ll be working a combination of knit and slip stitches with yarn overs‚ creating the distinctive ribbed pattern. Remember to bring the working yarn to the front before slipping a stitch‚ ensuring the yarn over is correctly positioned.
As you progress‚ you’ll notice the alternating knit and purled stitches forming those beautiful rows. Keep your tension consistent to achieve an even texture throughout your project. Don’t be afraid to unravel and redo if needed; practice makes perfect!
Once you’ve mastered the basic row‚ continue repeating it to build your brioche fabric. With each row‚ the stitch will grow and show its beauty. Enjoy the process and create gorgeous projects with rich texture.
Remember‚ the key to successful brioche stitch is patience and attention to detail. Don’t rush‚ take your time‚ and enjoy the process of creating something beautiful. Start off with a simple scarf project.
Fixing Mistakes in One-Color Brioche
Even experienced knitters make mistakes‚ and brioche stitch is no exception. If you drop a stitch‚ don’t panic! Carefully pick it up‚ ensuring you maintain the correct orientation of the yarn over. Use a crochet hook to help guide the yarn through the loops‚ recreating the brioche stitch. A dropped stitch can easily be fixed.
Another common mistake is accidentally creating an extra yarn over. If you notice an unwanted yarn over‚ simply drop it off the needle on the next row. Similarly‚ if you miss a yarn over‚ you can create one by carefully lifting the working yarn over the needle.
If you find that your stitches are twisted or uneven‚ take a close look at your tension. Adjust your tension to create a more uniform fabric. Sometimes‚ simply blocking your finished project can help even out minor imperfections.
For more complex errors‚ such as rows of incorrect stitches‚ it may be necessary to unravel your work back to the point of the mistake. Use stitch markers to mark the beginning and end of rows‚ making it easier to spot errors and unravel your work when needed.
Remember‚ fixing mistakes is a part of the knitting process. Don’t get discouraged; view each mistake as an opportunity to learn and improve your skills. With practice‚ you’ll become more adept at spotting and correcting errors in your one-color brioche projects.

Two-Color Brioche Stitch Tutorial
Two-color brioche elevates the texture and visual appeal of this technique‚ creating a reversible fabric with distinct colors on each side. This tutorial guides you through the steps of working two-color brioche‚ making it easier to spot mistakes due to the contrasting colors. Begin by casting on an even number of stitches using both colors.
The first row involves alternating slipped stitches and yarn overs with each color. Slip one stitch purlwise with yarn in front‚ then yarn over and knit the next stitch together with its corresponding yarn over from the previous row. Repeat this sequence across the row‚ alternating colors.
On subsequent rows‚ work the same pattern‚ ensuring that you are always knitting together the slipped stitch and yarn over of the same color. This creates the distinctive brioche ribbing‚ with each color popping on alternating rows.
Pay close attention to your tension and yarn placement to maintain a consistent and even fabric. Using stitch markers can help you keep track of your rows and prevent errors.
Two-color brioche is a versatile technique that can be used for a variety of projects‚ from scarves and hats to blankets and sweaters. The contrasting colors add depth and dimension to your knitting‚ making it a visually stunning and rewarding experience. Embark on creating a new brioche project!

Brioche Stitch in the Round
Knitting brioche stitch in the round opens up exciting possibilities for seamless projects like hats‚ cowls‚ and even sweaters. This tutorial will guide you through adapting the basic brioche stitch to circular knitting‚ creating a continuous‚ reversible fabric.
Begin by casting on an even number of stitches onto your circular needle and joining in the round‚ being careful not to twist the stitches. The first round typically involves setting up the brioche pattern with alternating slipped stitches and yarn overs.
In subsequent rounds‚ you’ll work brioche knit (brk) and brioche purl (brp) stitches‚ which involve knitting or purling together the slipped stitch and yarn over from the previous round. These stitches create the characteristic brioche ribs.
To maintain the reversible nature of brioche in the round‚ you’ll need to alternate between two different rounds‚ each working a different combination of brk and brp stitches. This ensures that both sides of the fabric have the same textured appearance.
Using stitch markers to mark the beginning of each round can be helpful‚ especially when working with more complex brioche patterns. Pay close attention to your tension and yarn placement to achieve a consistent and even fabric throughout your project. Enjoy knitting seamless projects!

No Responses